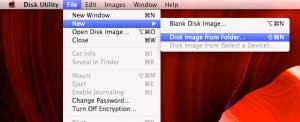
Thanks to Apple and Mountain Lion, password protecting your folders is easier then ever. This is ideal for things that you want kept unseen or safe in case your computer is stolen. The process starts by first opening Disk Utility under Utilities in the application folder. After that go to File -> New -> Disk Image From Folder…
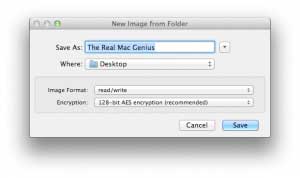
Once that is open, select the file you would like protected. Fill in the Save As and Where information, then for Image Format select: read/ write and for Encryption select: 128-bit. Press save.
 Let it load and enter in your desired password. After, go to the Remember Password in My Keychain check box. Note that if the boxed is click it will automatically open the folder without the need of a password, but if its unchecked you will need to enter the password in every time you want to access the folder on your desktop.
After that look in the area where you saved your file and your password protected folder will apear as a .dmg, next you will need to click on it and enter your password to access the drive. From there you can just click on the drive, and your files from the folder will apear. The picture shows the three files you should end up with.


Dosent filter anything
I have tried all of them and still unable to send pictures messages to android users. Help please
I wish I would have stayed with High Sierra or Catalina. Big Sur doesn't work with Time Machine, Messages, Spotlight…
My updated my Mac with Big Sur and it is stuck and says it has less than a minute to…
This was extremely helpful and just what I was looking for! The Carbon Copy Cloner is still holding back my…