Apple makes it easy to move data between Macs. You can send files via AirDrop, attach them to an email message, put them in a Messages conversation, turn on and connect via File Sharing, or use a file-sharing service like iCloud Drive, Dropbox, or Google Drive as an intermediary, to name just a few of the more obvious approaches.
But what if you have a lot of data—say tens or even hundreds of gigabytes—to transfer from one Mac to another? The techniques listed above might work, but we wouldn’t bet on it. If you had an external drive with sufficient free space handy, you could copy all the data to it from one Mac and then copy the data from it to another Mac. To cut the copy time in half, try Target Disk Mode instead. You may even be able to use Target Disk Mode on an older Mac to transfer an account with Migration Assistant when setting up a new Mac.
What Is Target Disk Mode?
Target Disk Mode is a special boot mode for Intel-based Macs and an option in macOS Recovery on Macs with Apple silicon that enables one Mac to behave like an external drive for another Mac. Target Disk Mode is nearly universal, easy to set up, and one of the fastest methods of moving files between Macs. Let’s unpack that statement:
- Nearly universal: Every Mac sold in the last decade supports Target Disk Mode, so you can be sure it will work with any modern Mac. That’s true of both Intel-based Macs and Macs with Apple silicon.
- Easy setup: Because Apple has baked Target Disk Mode into the Mac firmware, the version of macOS is irrelevant beyond the Thunderbolt cable requirement discussed below. There’s no software to configure nor any permissions to worry about. Putting a Mac into Target Disk Mode is particularly simple on Intel-based Macs, but it’s also easy on Macs with Apple silicon.
- Speed: Because you’re connecting one Mac directly to another using Thunderbolt, you’ll get the fastest transfer speeds available.
If either Mac has macOS 11 Big Sur or later installed, you’ll need to connect them with a Thunderbolt cable—it’s fine to use Apple’s Thunderbolt 3 to Thunderbolt 2 adapter for connecting newer and older Thunderbolt-capable Macs. If both Macs are running an earlier version of macOS, you can use Thunderbolt, USB, or FireWire, depending on the available ports. (Note that the Apple USB-C Charge Cable that comes with the Apple power adapter doesn’t support Target Disk Mode, so if that’s the cable you were planning to use, sorry, but you’ll need to buy a real Thunderbolt cable.)
Step-by-Step Instructions for Intel-based Macs
To put an Intel-based Mac into Target Disk Mode for copying data, follow these steps:
- Connect the source Mac to the destination Mac with an appropriate cable.
- On the source Mac, either:
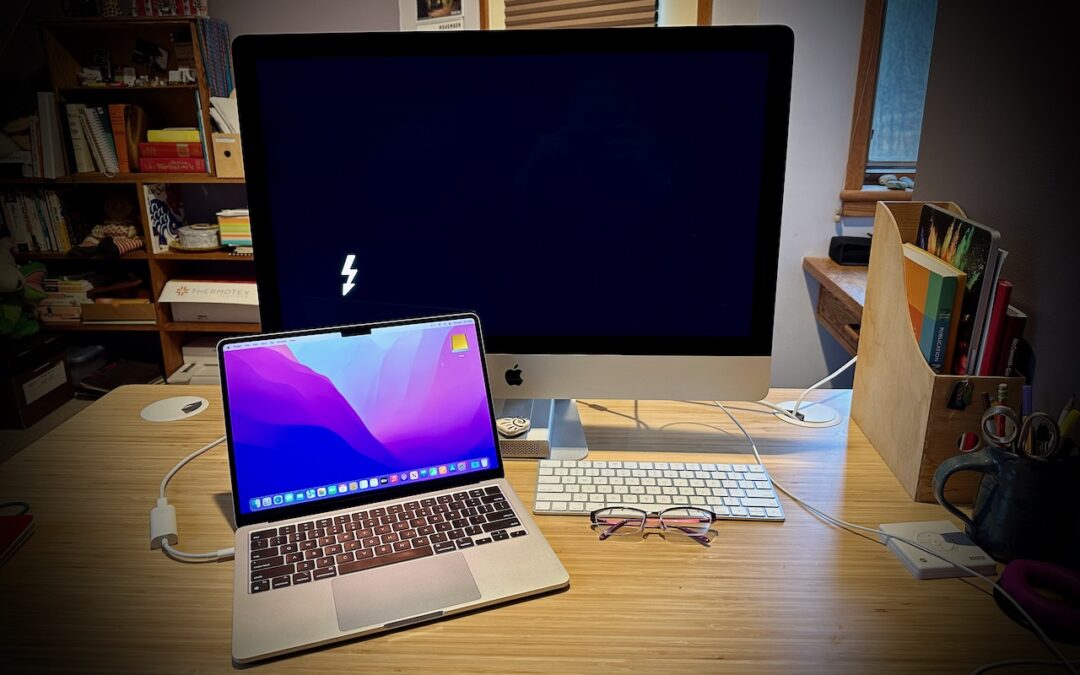
- Restart the Mac, and once it starts booting, hold down the T key until you see the Target Disk Mode screen with a bouncing Thunderbolt logo.
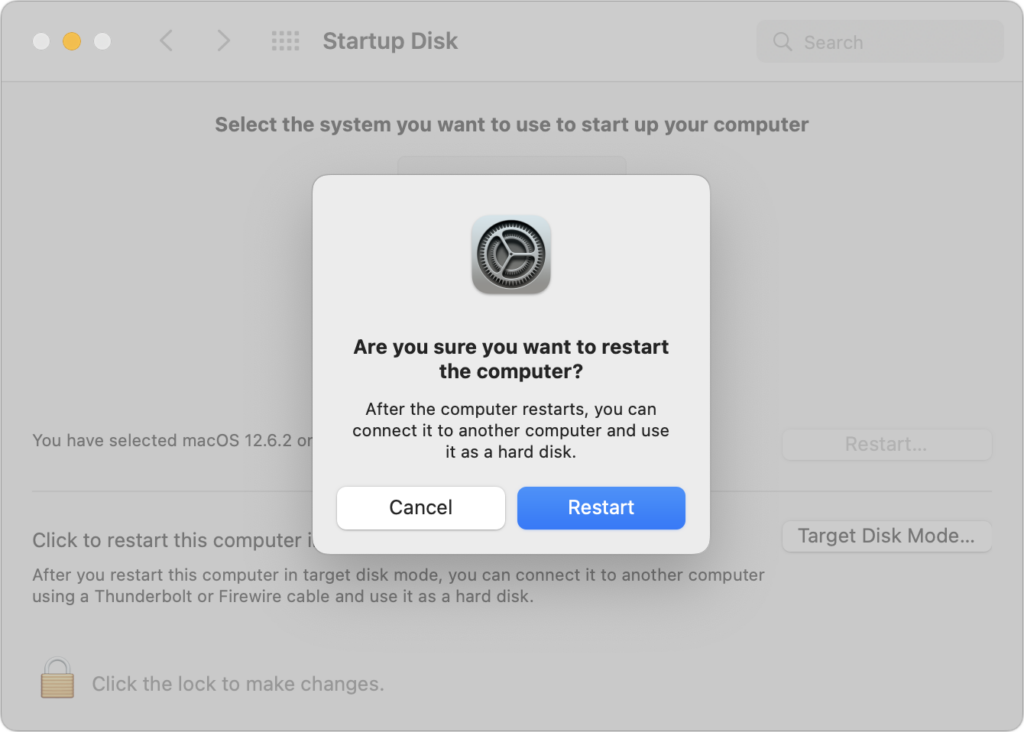
- Open System Settings/Preferences > Startup Disk, click Target Disk Mode, and then click Restart.

- The source Mac’s data and applications volume appears on the destination Mac’s Desktop like an external drive; if the source Mac is encrypted with FileVault, give it a minute to appear on the destination Mac, after which you’ll need to enter its password.
- Transfer the files as you would normally.
- When you’re done, unmount the source Mac’s drive by dragging it to the Trash in the Dock. Then press and hold the power button on the source Mac for a few seconds to shut it down.
Step-by-Step Instructions for Macs with Apple Silicon
The process is somewhat more involved for Macs with Apple silicon, where the shared drive or volume appears like a network volume:
- Connect the source Mac to the destination Mac with an appropriate cable.
- On the Mac with Apple silicon, choose Shut Down from the Apple menu to turn it off.
- Press and hold the power button until “Loading startup options” appears.
- Click Options, and then click Continue to enter macOS Recovery.
- Select a user, click Next, enter the user’s password, and click Continue.
- Choose Utilities > Share Disk.
- Select the drive or volume you want to share, and click Start Sharing. (If the drive is encrypted using FileVault, click Unlock and enter the FileVault password first.)
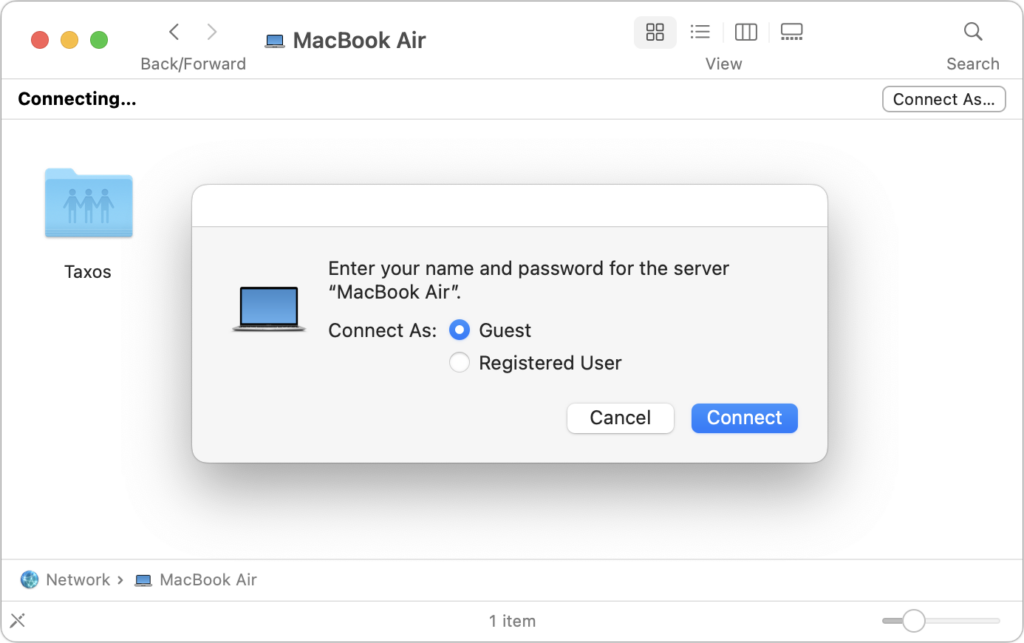
- On the destination Mac, open a Finder window and click Network (under Locations) at the bottom of the sidebar.
- In the Network window, double-click the Mac with the shared drive or volume, click Connect As, select Guest in the Connect As window, and then click Connect. The shared drive or volume becomes available like any other external hard drive.

- Transfer the files as you would normally.
- When you’re done, unmount the shared drive or volume by dragging it to the Trash, then click Stop Sharing on the source Mac.
Although it’s not something you’ll use every day, Target Disk Mode is one of the unsung innovations that has made Macs easier to use for decades, and it’s well worth keeping in mind whenever you need to move lots of data between machines.
(Featured image by Adam Engst)


Super insightful and fresh perspective.
Well explained and easy to follow.
So glad I stumbled upon this.
Looking forward to your next post!
Truly a masterpiece of content.